
0. Foreword#
In this article you’ll learn:
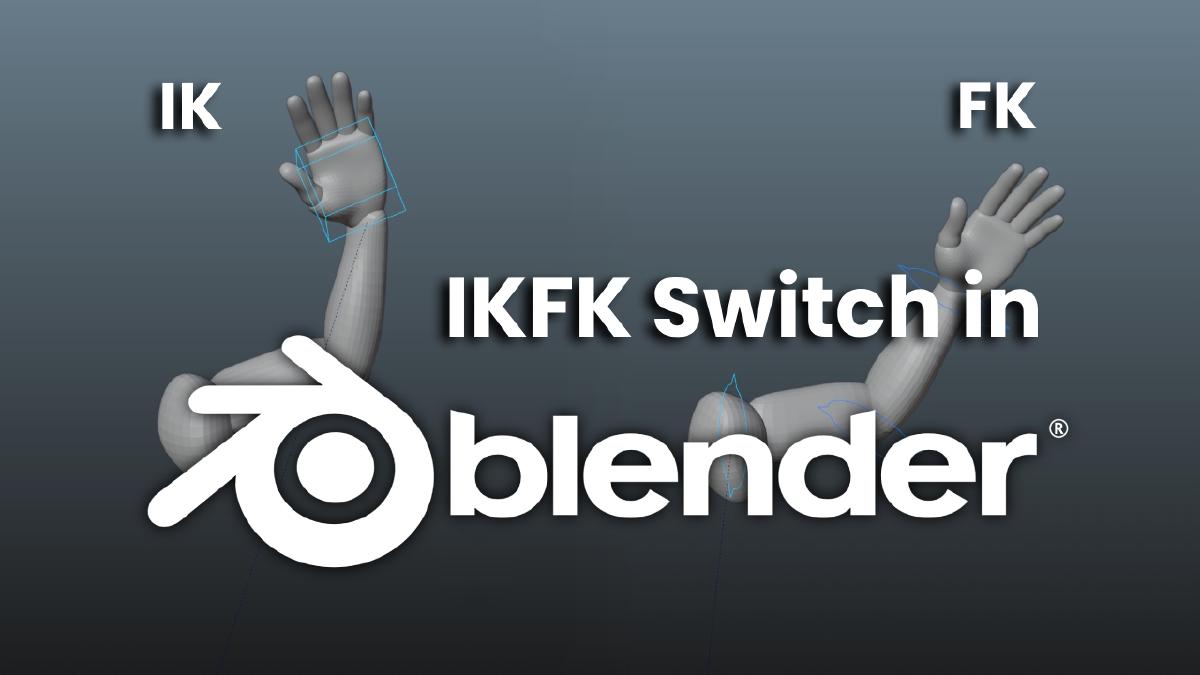
- The difference between Forward Kinematics (FK) and Inverse Kinematics (IK)
- How to set up an IKFK switch in blender
- Creating and using custom properties for seamless IKFK transitions
Download the project files here.
1. Why do we need an IKFK switch?#
What do IK and FK mean?#
If you’re new to the concepts of FK (Forward Kinematics) and IK (Inverse Kinematics), then let’s start with a quick overview - these terms relate to how the bone chain behave in animation.
Forward Kinematics#
Forward Kinematics - FK for short - is a standard bone chain behavior. In an FK setup, each bone in chain follows the transformations of it’s parent. For example, let’s look at an FK_Arm setup:
arm
    forearm
        hand
Rotating the arm is also going to rotate the forearm and hand because they are down in the arm’s hierarchy. Typically, these chains are controlled by rotation of each bone. Translation might be possible in some setups, but it isn’t the standard. Forward Kinematics chain is great for creating smooth, natural arcs in animation, as it requires keyframing each bone individually, it promotes overlapping by offsetting each bone keyframes.
Inverse Kinematics#

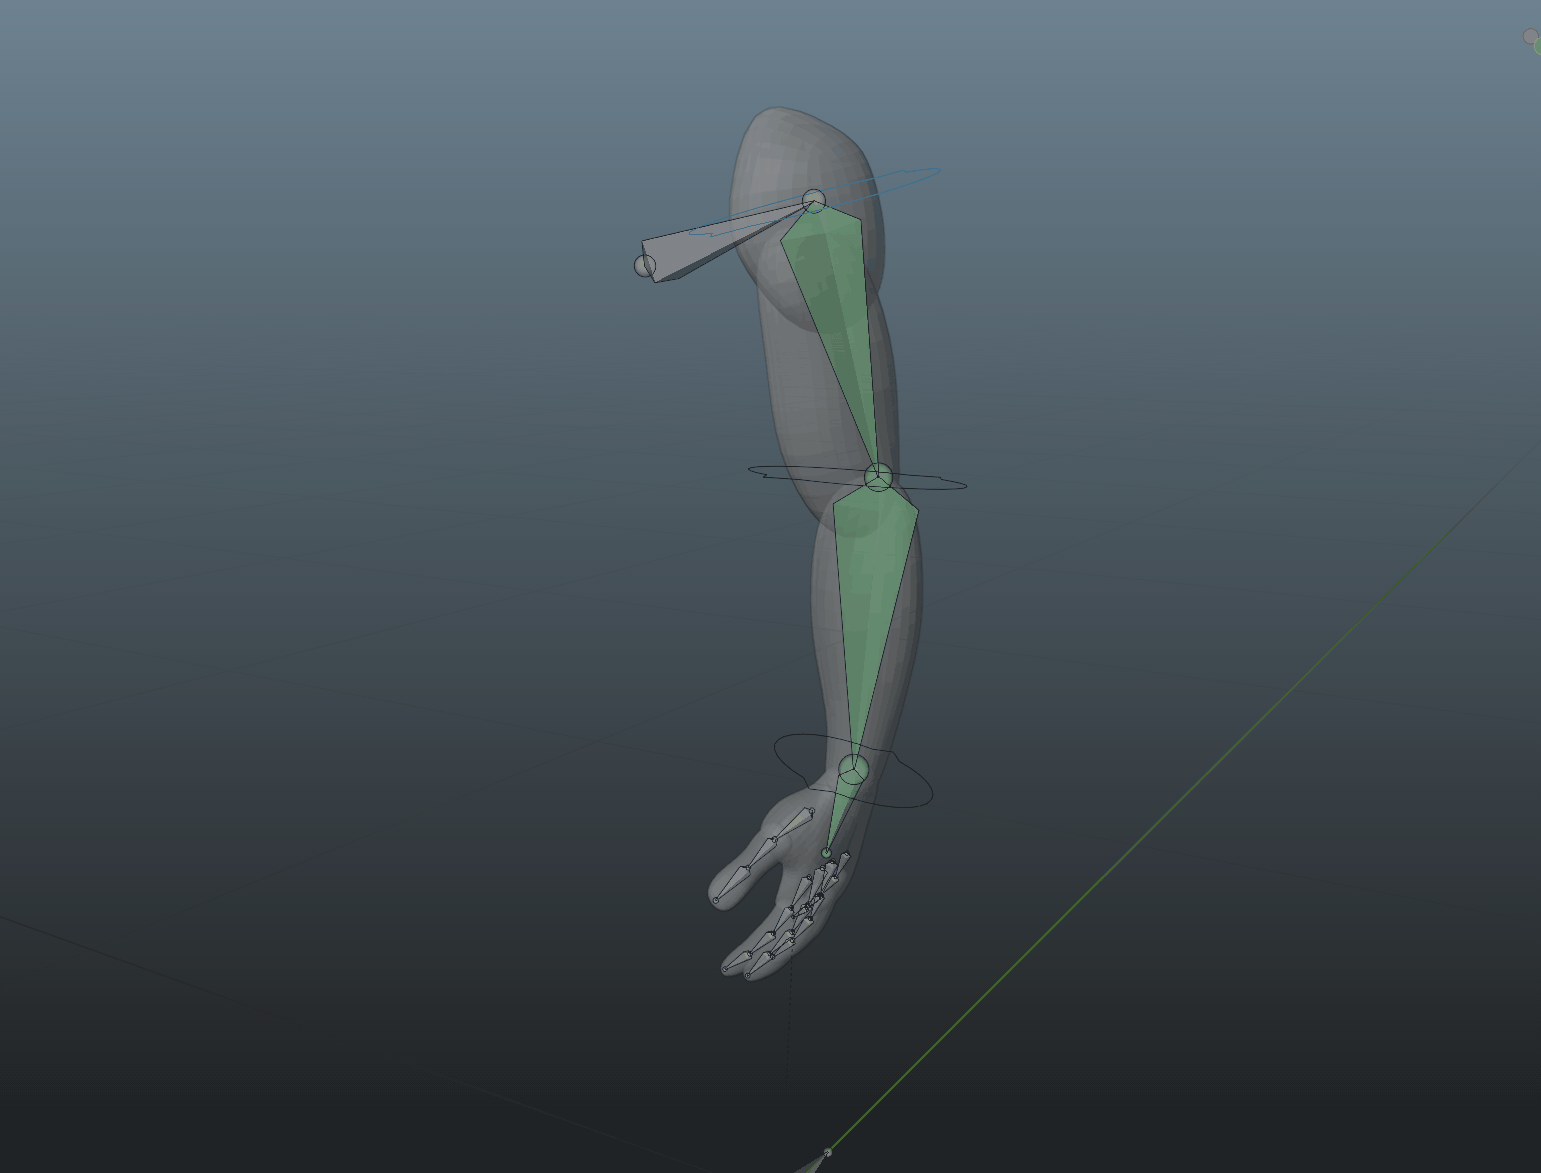
Inverse KInematics - abbreviated as IK - works in the opposite manner. It makes the end bone of the chain the primary motion driver. In an IK setup, moving the end bone (like hand in our arm chain) influences the positions and rotations of the parent bones (arm and forearm). This allows for both rotation and translation of the end bone, with the parent bone adjusting to maintain the correct position. To help control the rotation and bending direction, IK setups include a pole target, to which the bend “points to”.
IK is particularly useful for animating limbs that interact with the environment, such as a foot maintaining the contact with the ground during a walk cycle. The end bone (foot in this case) can be “pinned” in place, while the rest of the body moves, providing stability and precise control over the limb’s position.
2. How to create an IKFK switch in blender?#
Preparation#
First, if you havem’t already, download the project files.
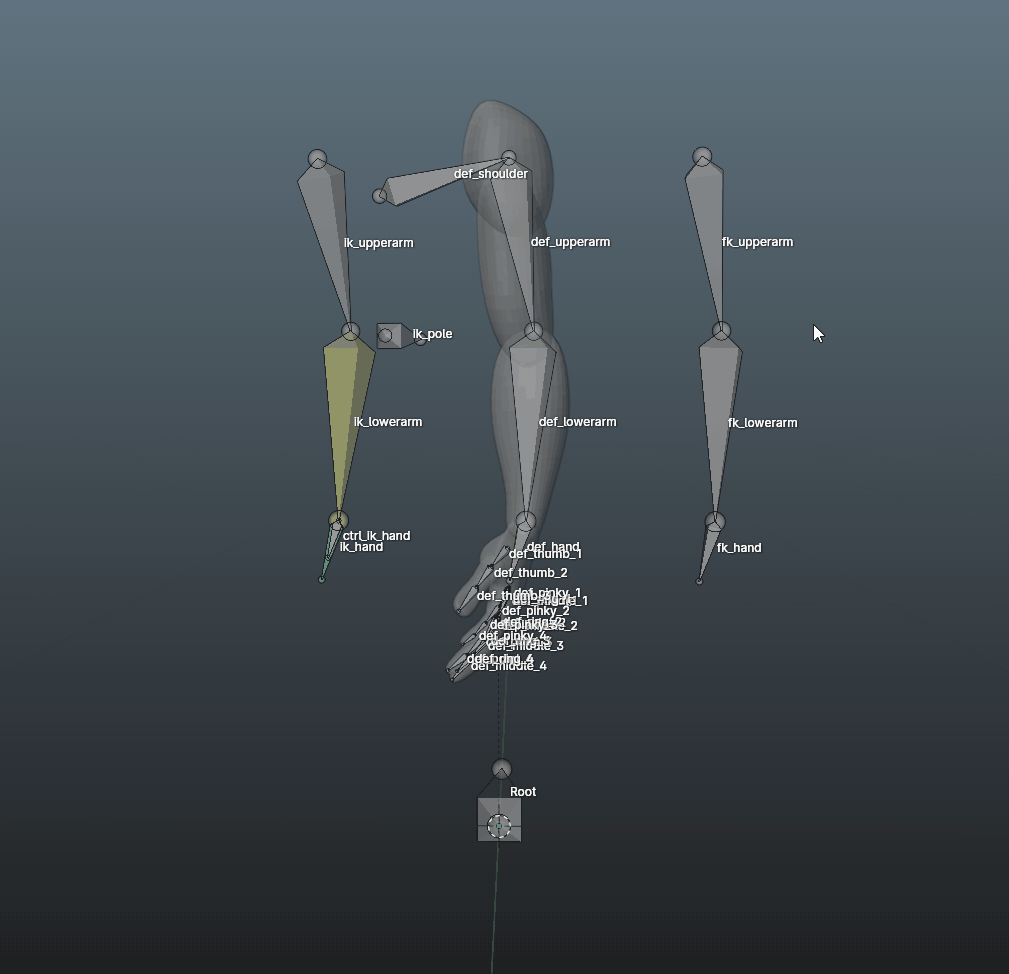
After opening the ikfkswitcher_start.blend file, your screen should look like this: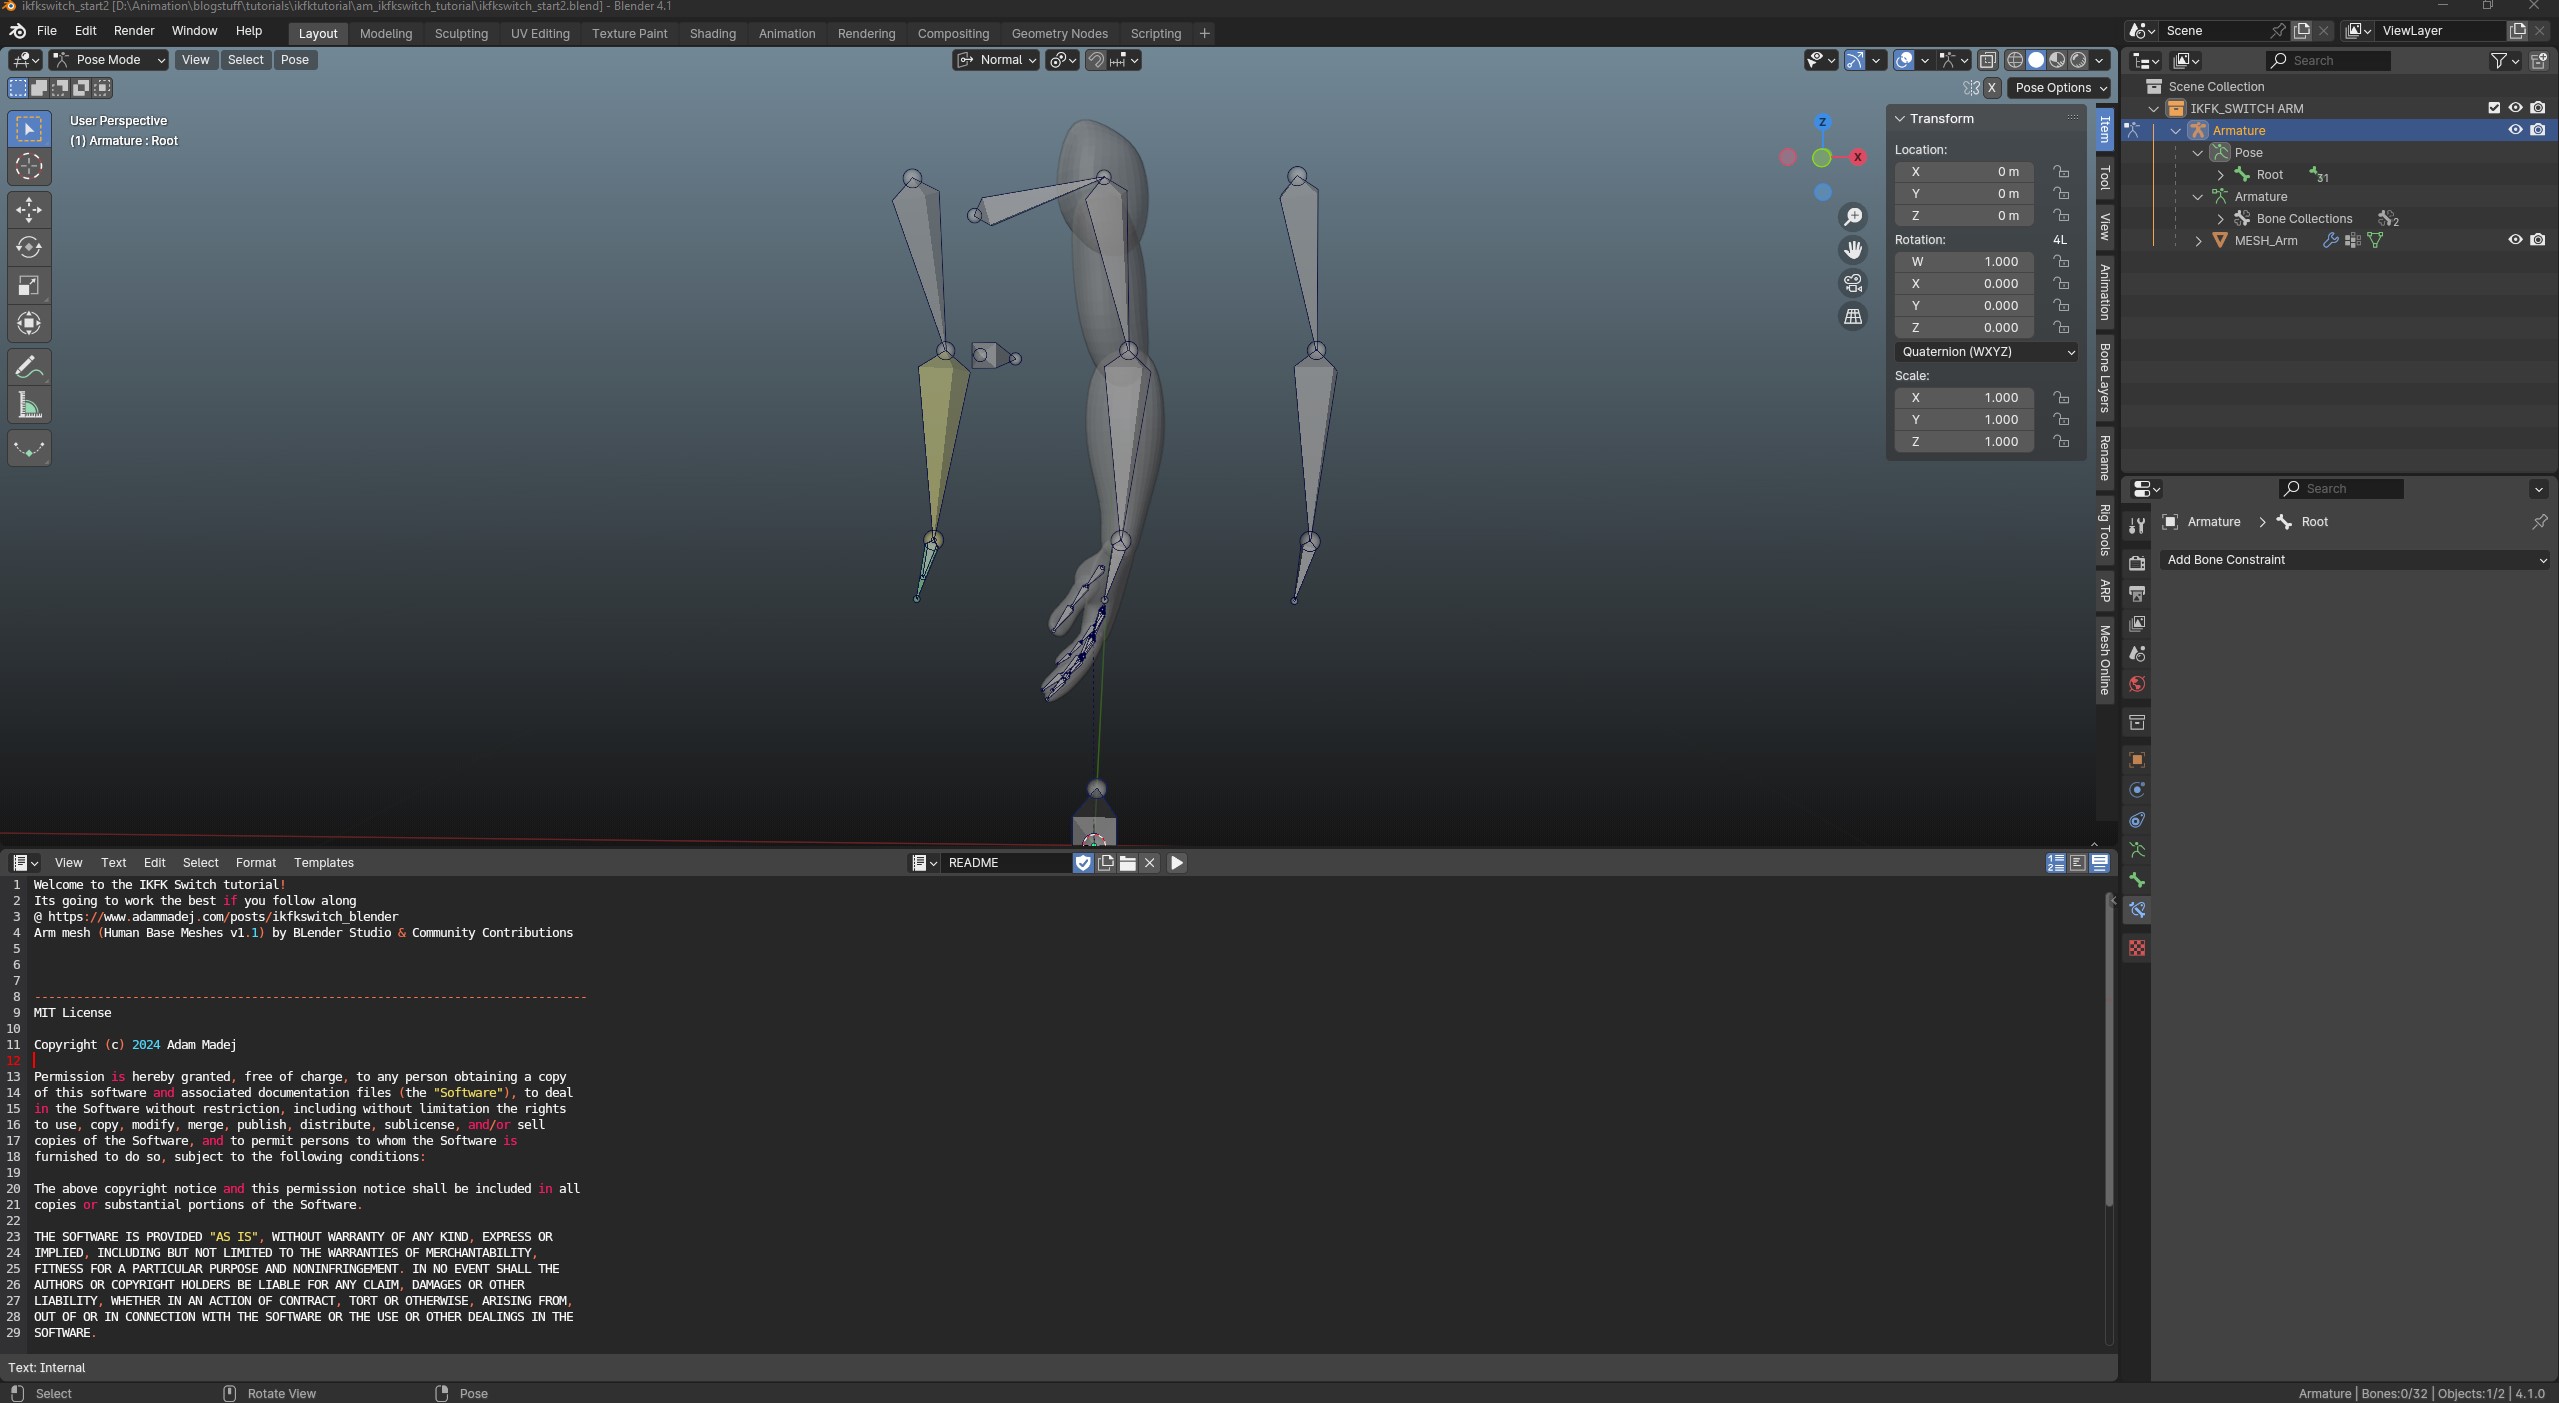
Close the note by dragging the viewport corner over it, and let’s start rigging!
Parenting the FK Skeleton#
To start, switch to Pose Mode and make sure the bone names are visible. Select the fk_ bone first, then SHIFT-click to select the corresponding def_ bone. Press SHIFT+CTRL+C to open the Bone Constraints context menu and choose Copy Transform.
Next, rename the constraint to FK_CopyTransform to keep things organized.
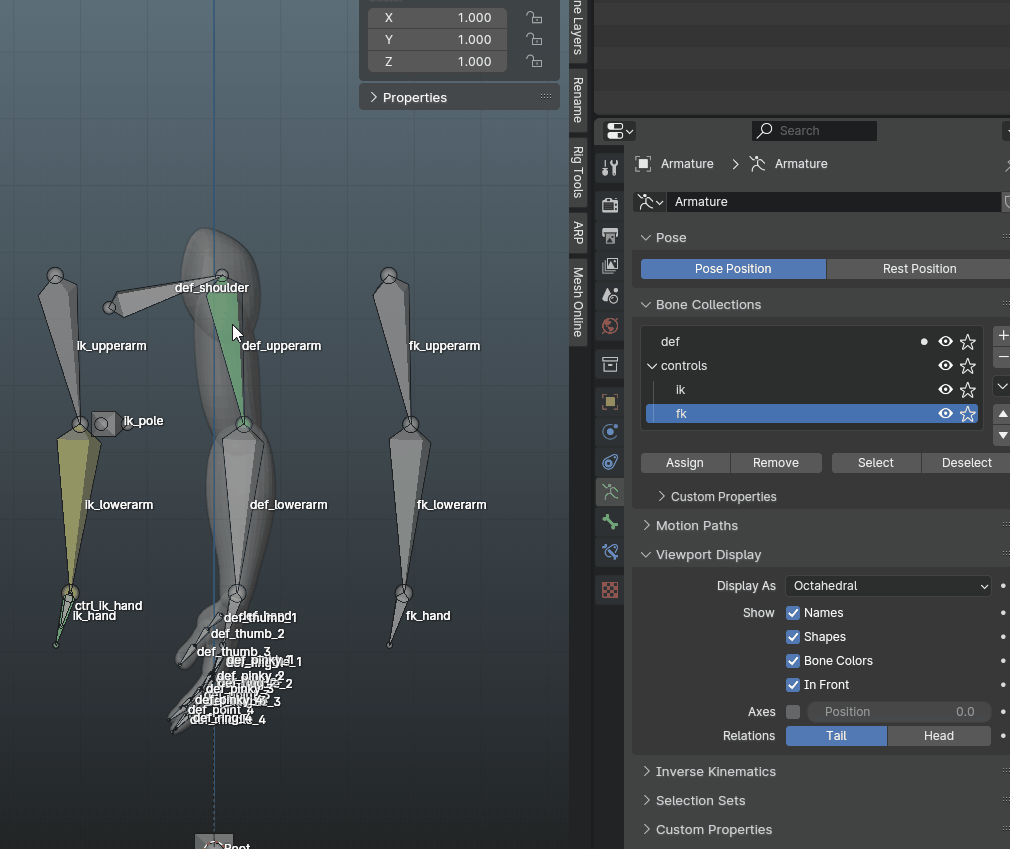
Repeat this process for the remaining fk_ bones, Once done, your rig should look like this:
Parenting the IK Skeleton#
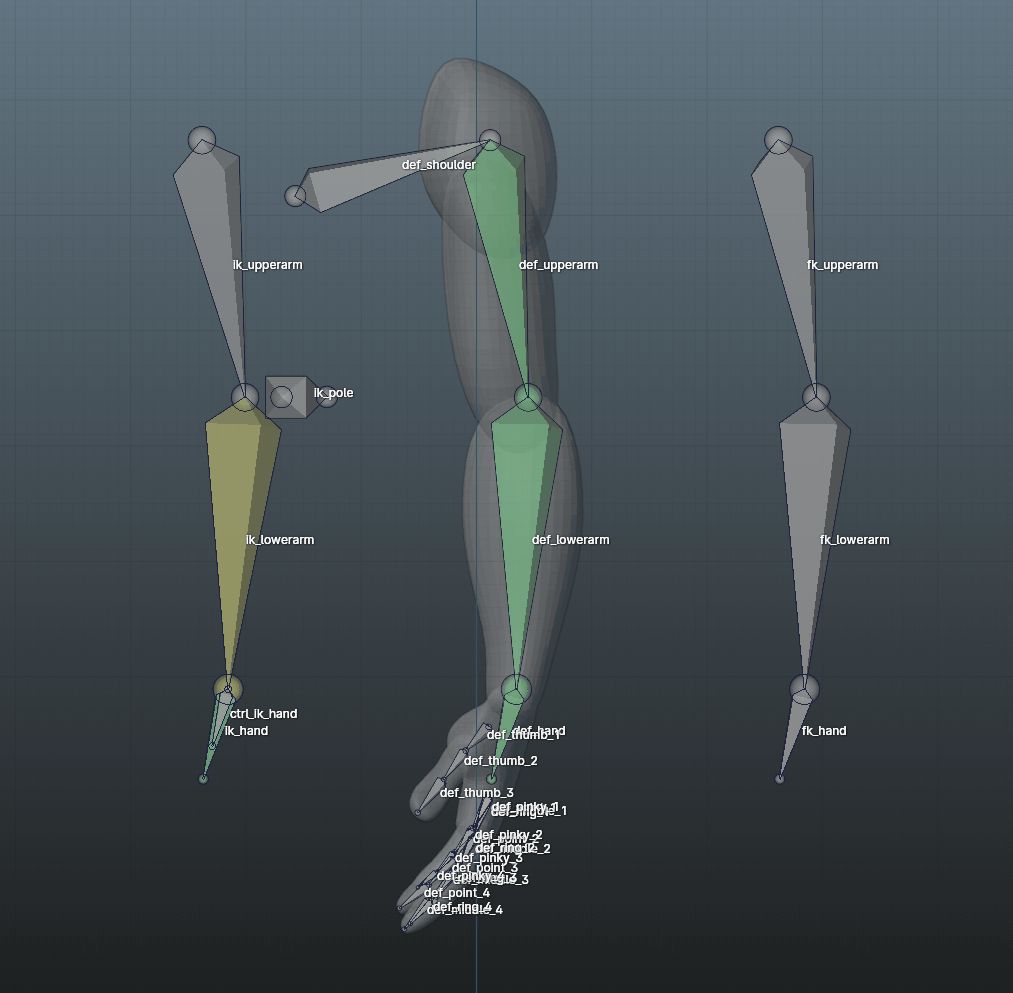
For the IK skeleton, follow the same steps as for the FK skeleton: add a Copy Transform constraint to the ik_ bones and rename the constraints to IK_CopyTransform.

After adding the IK_CopyTransform constraints, your def_ bones should no longer follow the fk_ bones. Blender’s constraint system reads from the bottom up, and checks the first constraint with 100% influence. If IK_CopyTransform is set to 1, it wont read FK_CopyTransform at all. We’ll use this blender property for the next step.
Creating a Custom Property#
There are different approaches to where the IKFK property should be located and as a rigger, it’s your choice where will you add it. For the simplicity, we’ll use the Root bone at the world’s origin. To add a property, click on the Root bone and navigate to Bone Properties, then open the Custom Properties menu.
Click the + NEW button, then use the cog icon to set up the property as follows:
- Type: Float (we’ll use the value from 0 to 1, allowing for a blend of both IK and FK influences)
- Property Name: IKFK_Switch
- Default Value: 1.00
- Min and Max: 0.00 and 1.00, respectively
- Soft Limits: [ ] (not used)
- Step: 0.10 (changes how much the value incremets with each left or right arrow click)
- Precision: 3
- Subtype: Plain Data
- Description: “Switches from IK to FK constraint” (for clarity)
- Library Overdrive: [x] (check this to ensure properties carry over when referencing rigs to other scenes)
Your menu should look like this: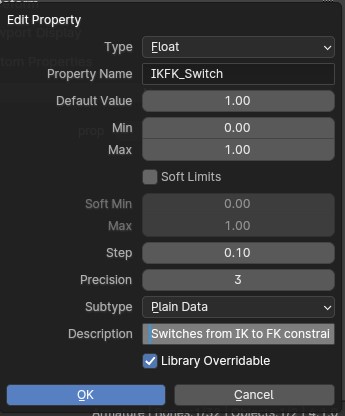
Adding the Custom Property as a CopyTransform Driver#
Next, right-click the property and select Copy as New Driver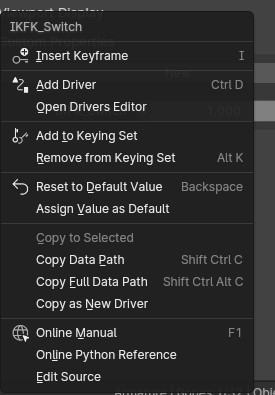
Set up the driver as follows:
- Type: Scripted Expression (we want to use our variable in an expression)
- Expression:
1-IKFK_Switch
The name must match your Custom Property name. This expression ensures that when the IKFK_Switch is set to 0, the def_bone follows the IK skeleton and when set to 1, it follows the FK skeleton. We’re substracting
because, as mentioned earlier, blender constraints read from bottom to top. If IK_CopyTransform has an influence of 0, blender will automatically use the next “full” influence constraint, FK_CopyTransform.
So, when IKFK_Switch is 1, the expression is 1 - 1 = 0, disabling the IK_CopyTransform. When the IKFK_Switch is 0, the expression is 1 - 0 = 1, enabling IK_CopyTransform and making the IK control the def_ bones.
If the rest of the driver setup isn’t filled automatically, click Copy Full Path of the Custom Property you’ve created and paste it in the driver editor.
The finished driver should look like this: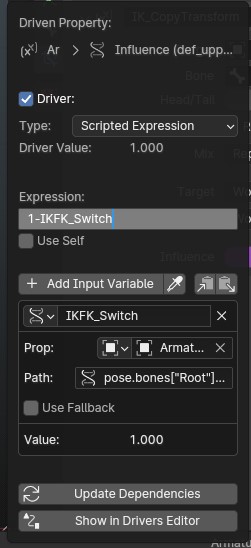
Now, right-click the newly created driver (indicated by violet color instead of blue) and use Copy Driver to copy it to the rest of def_ bones.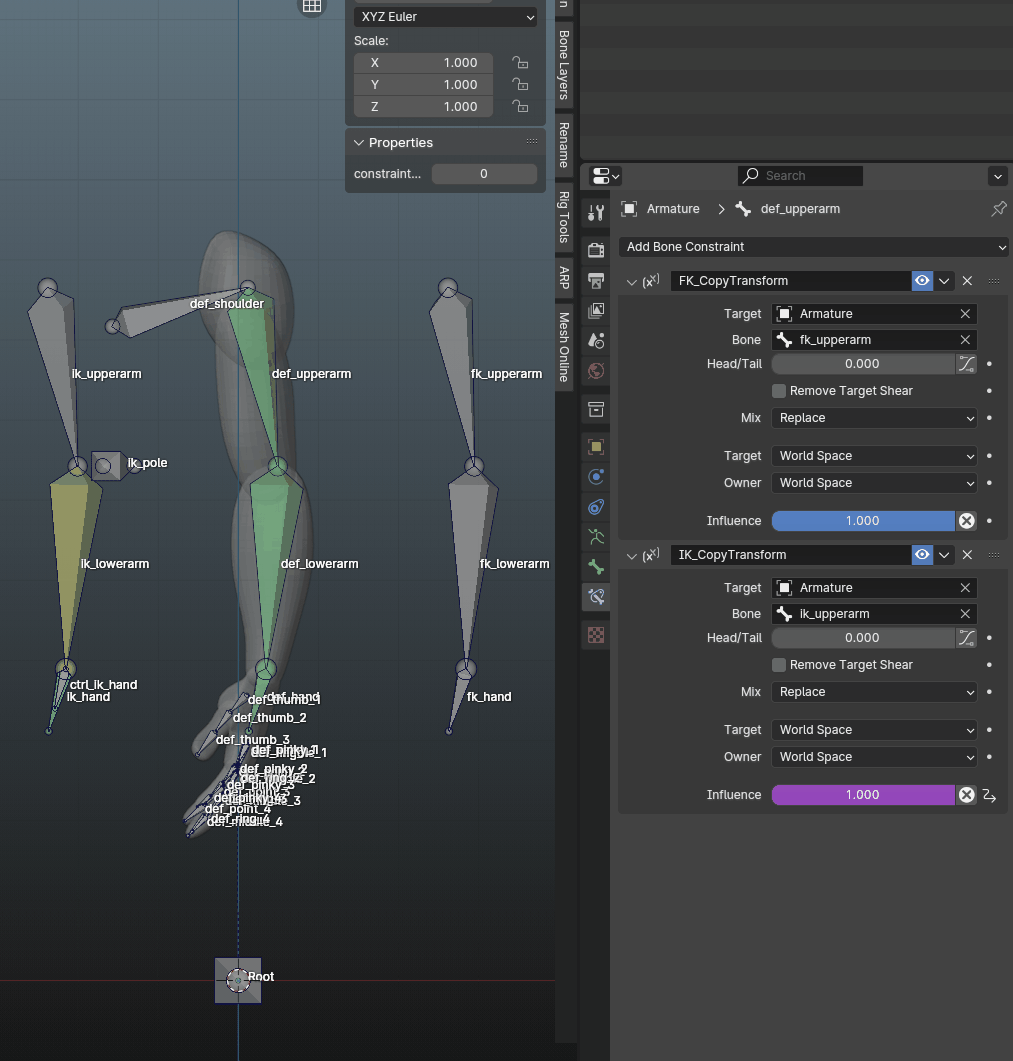
Using the Custom Property#
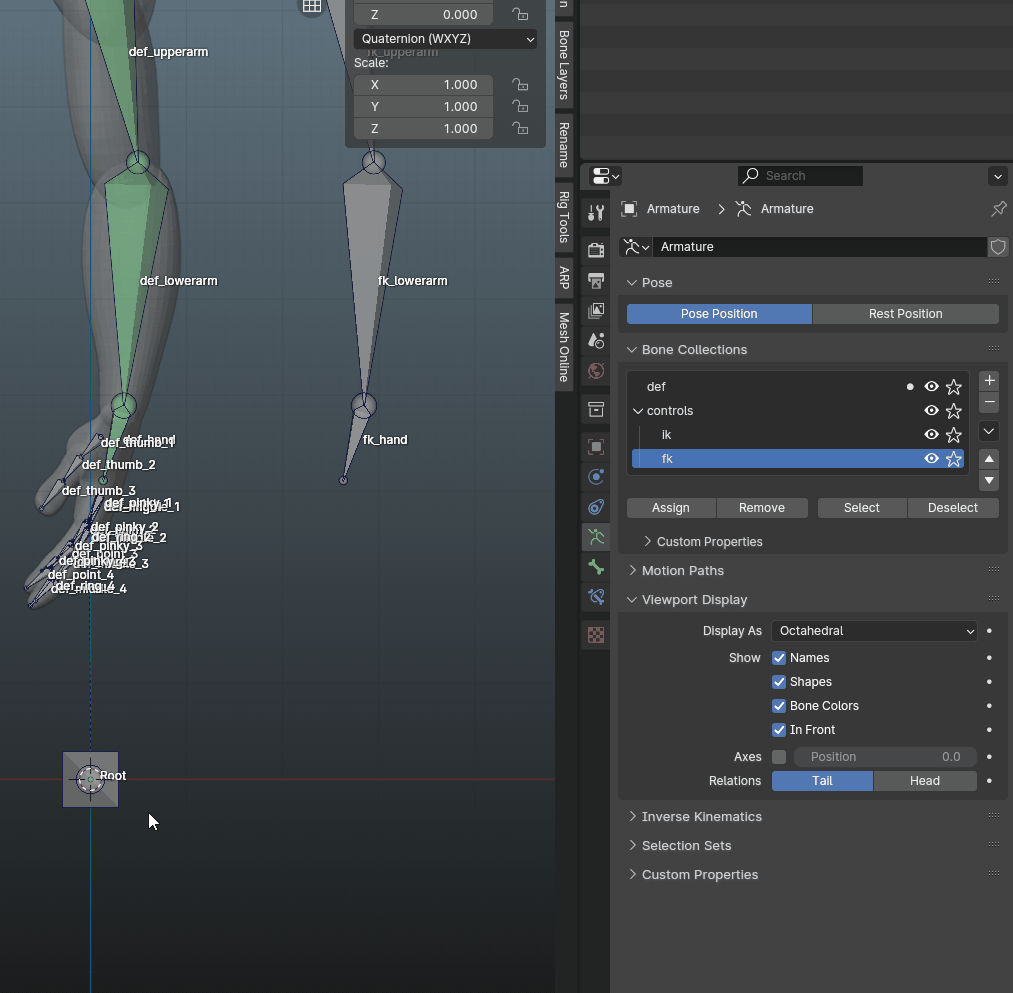
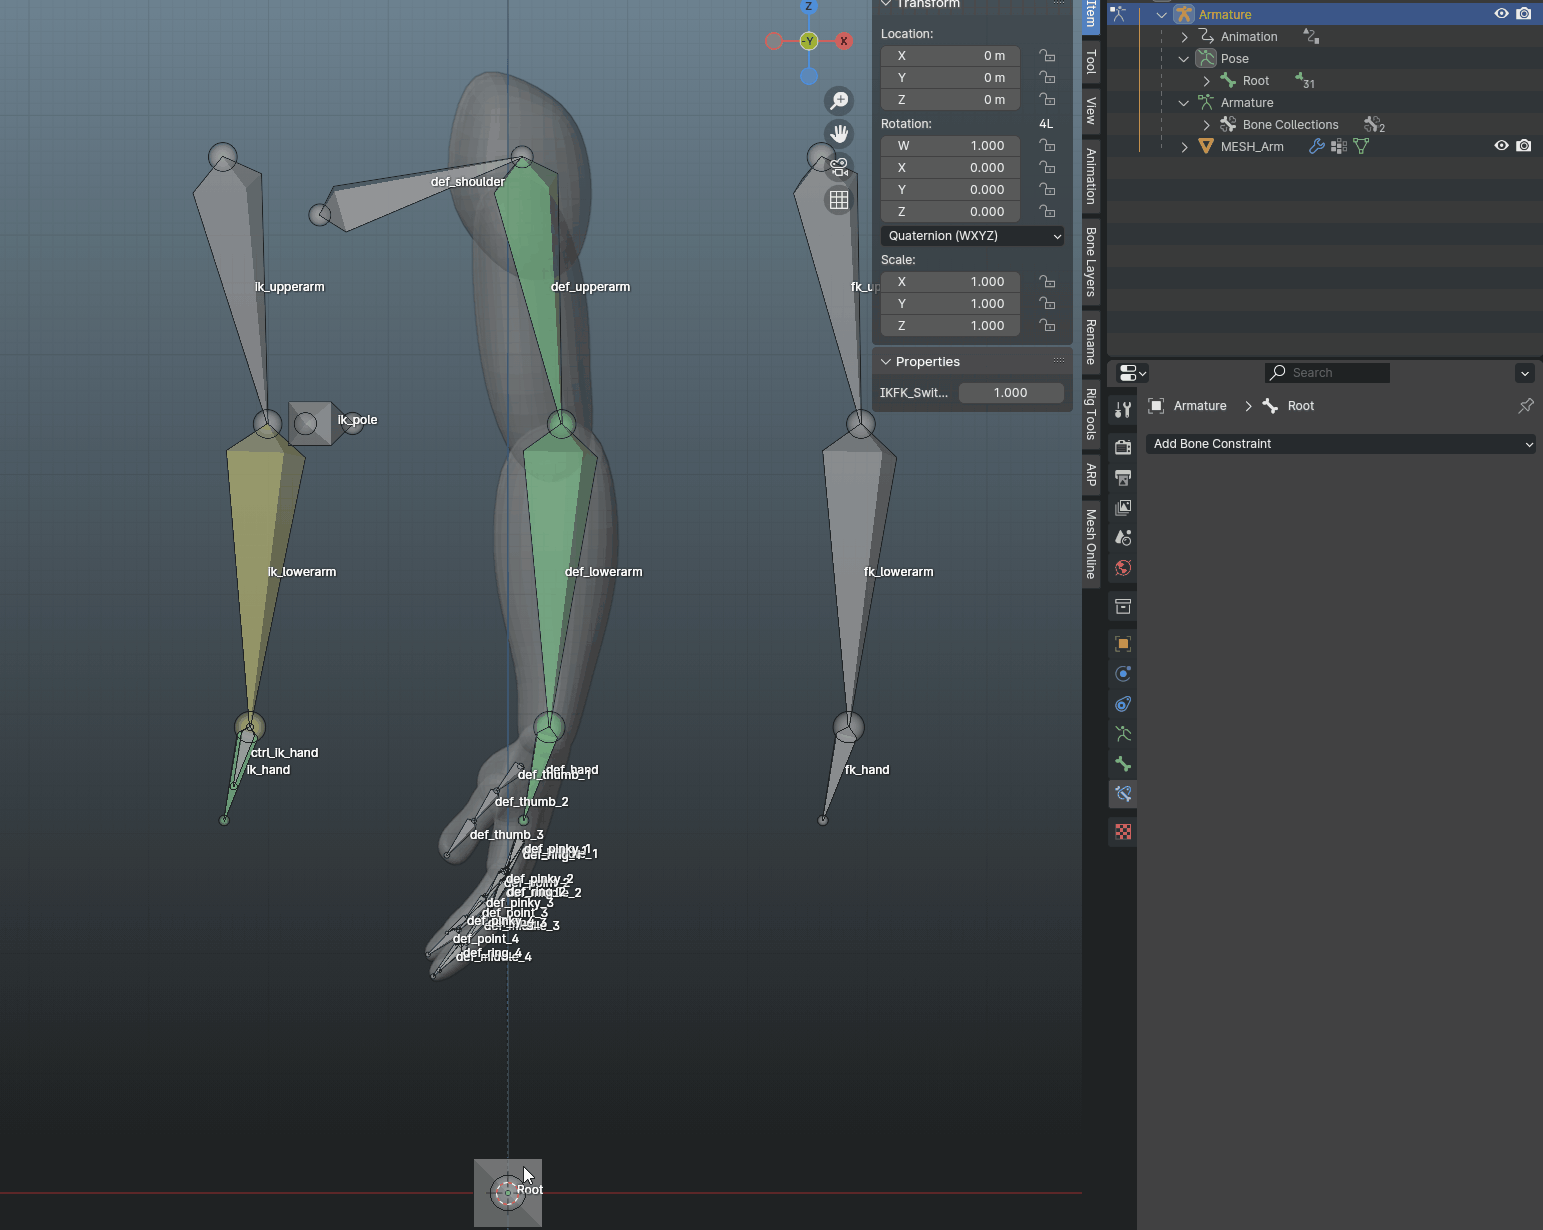
That’s all! Now we need to test if everything works properly. Click on Root bone and go to the Transform Tab to see the IKFK_Switch property.
If it’s there and you can move it from 0 to 1, pose both IK and FK bones and try switching between them. If everything was done correctly, the skinned arm should move between the poses you’ve created!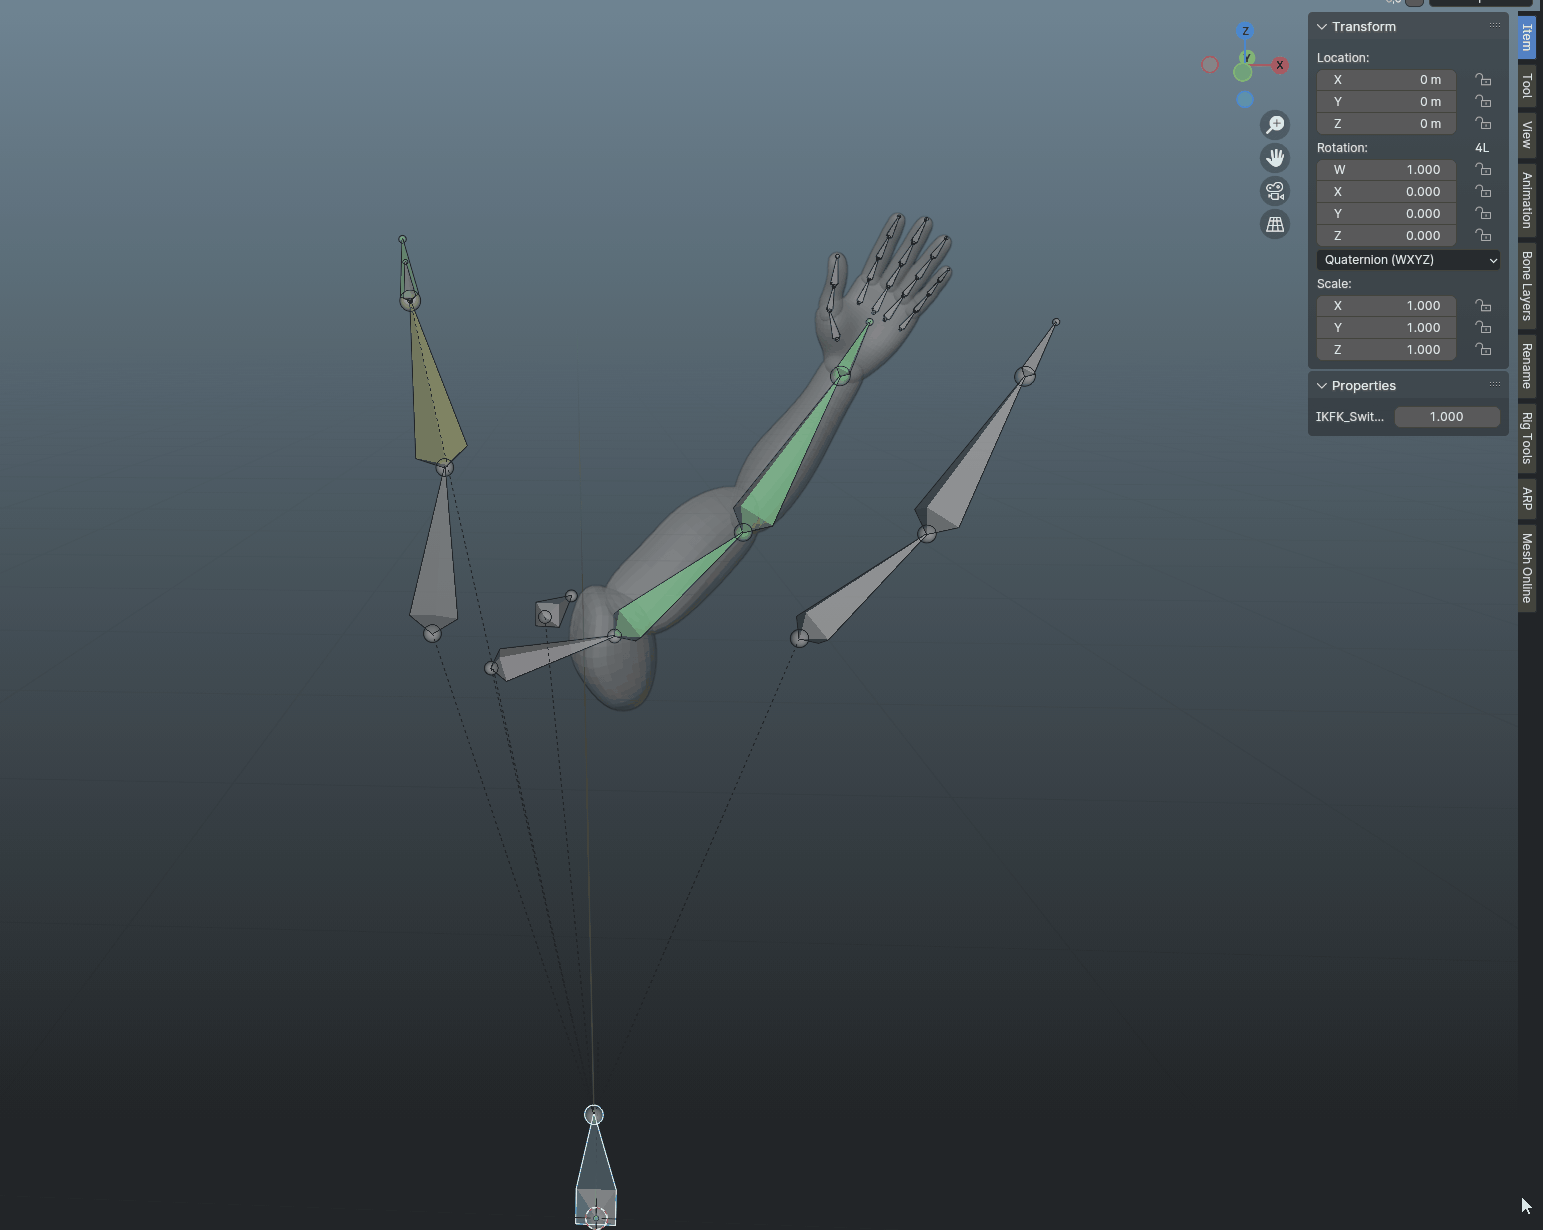
BONUS: Hiding unused controls with IKFK Switch#
As a bonus, let’s add a quick Quality of Life upgrade for our IKFK switch. Typically, with the controls set up as described earlier, you would need to manually show and hide the IK and FK controls. While this is manageable, as riggers we should aim to enhance the user experience. Therefore, we will streamline process by adding a couple of additional drivers.
First, return to the Root bone’s properties and again use Copy as New Driver for the IKFK_Switch property. Navigate to the Armature tab, right click the eye icon of the ik bone group, and select Paste Driver.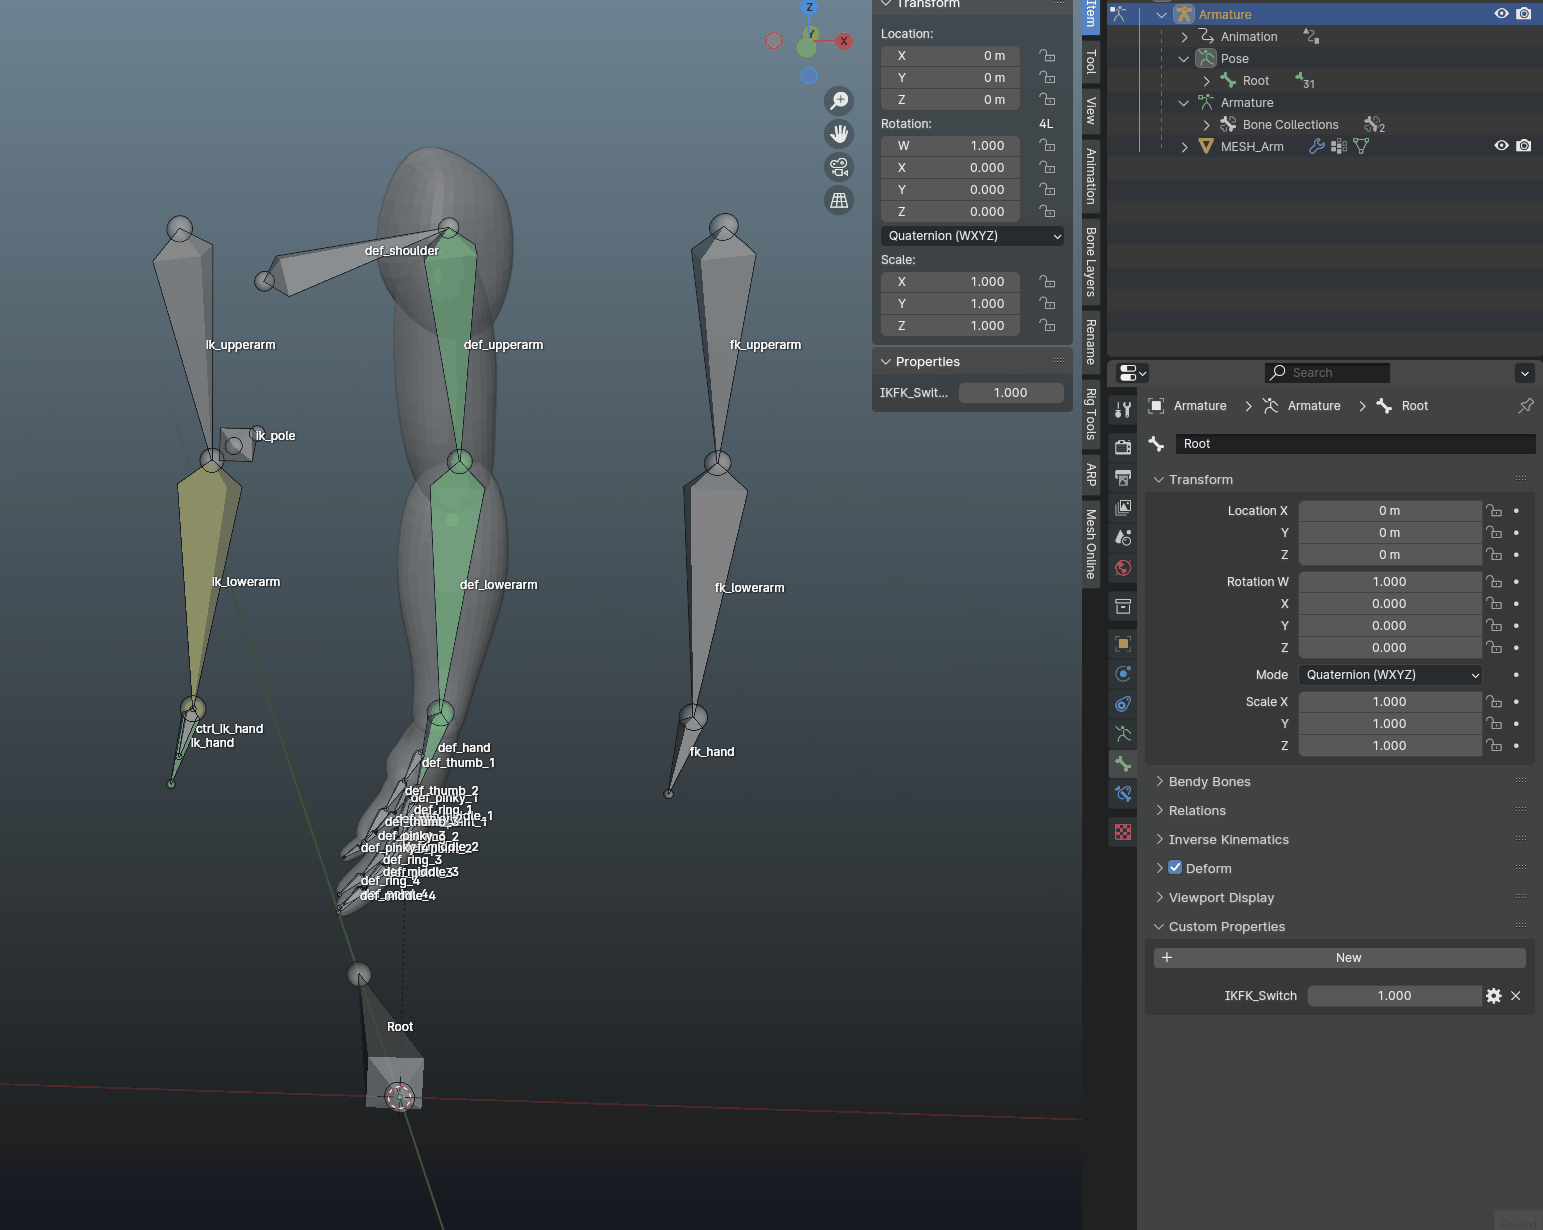
Next, right-click the visibility button and choose Edit Driver. Set up the driver as follows:
- Type: Scripted Expression
- Expression:
1-IKFK_Switch
After setting this up, test to ensure the IK controls dissapear when the IKFK_Switch is set to 1.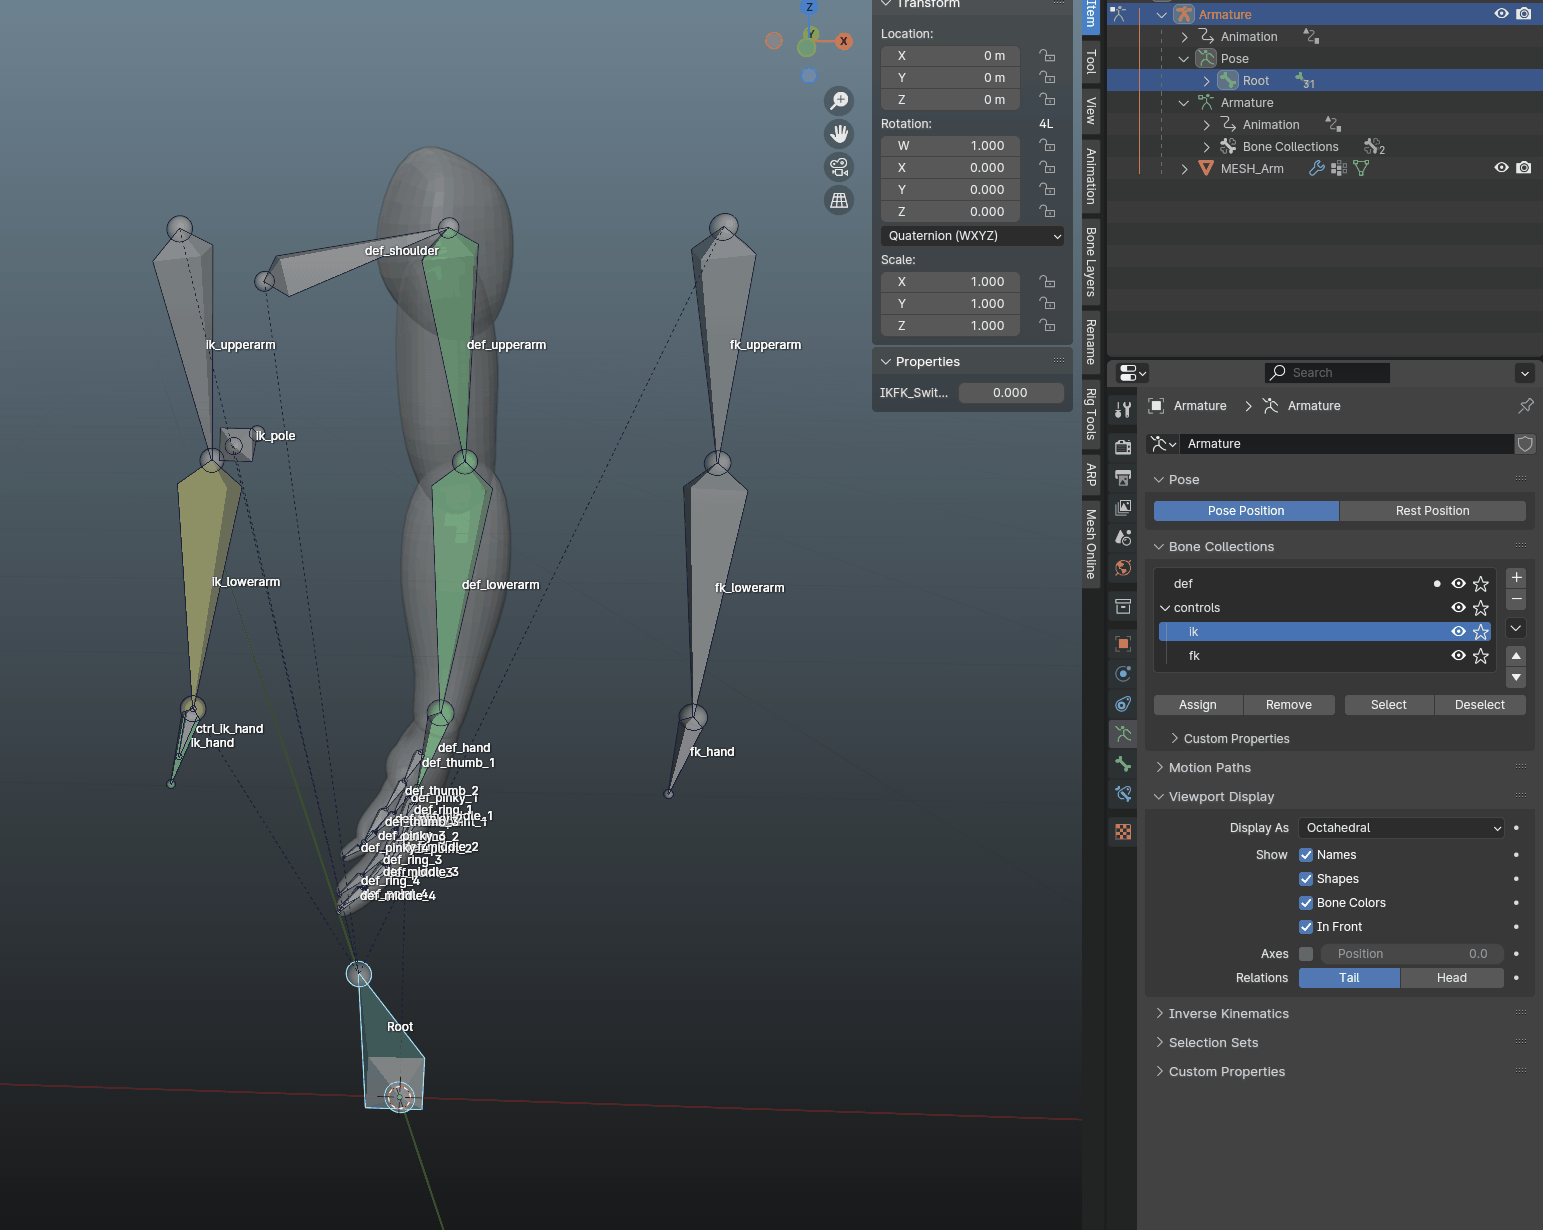
To apply the same logic to the FK chain, copy the driver from ik bone collection, paste it to the fk bone collection visibility, and change the expression to IKFK_Switch. This ensures that when the property is set to 0 (making the IK chian visible
and active), the FK chain is hidden.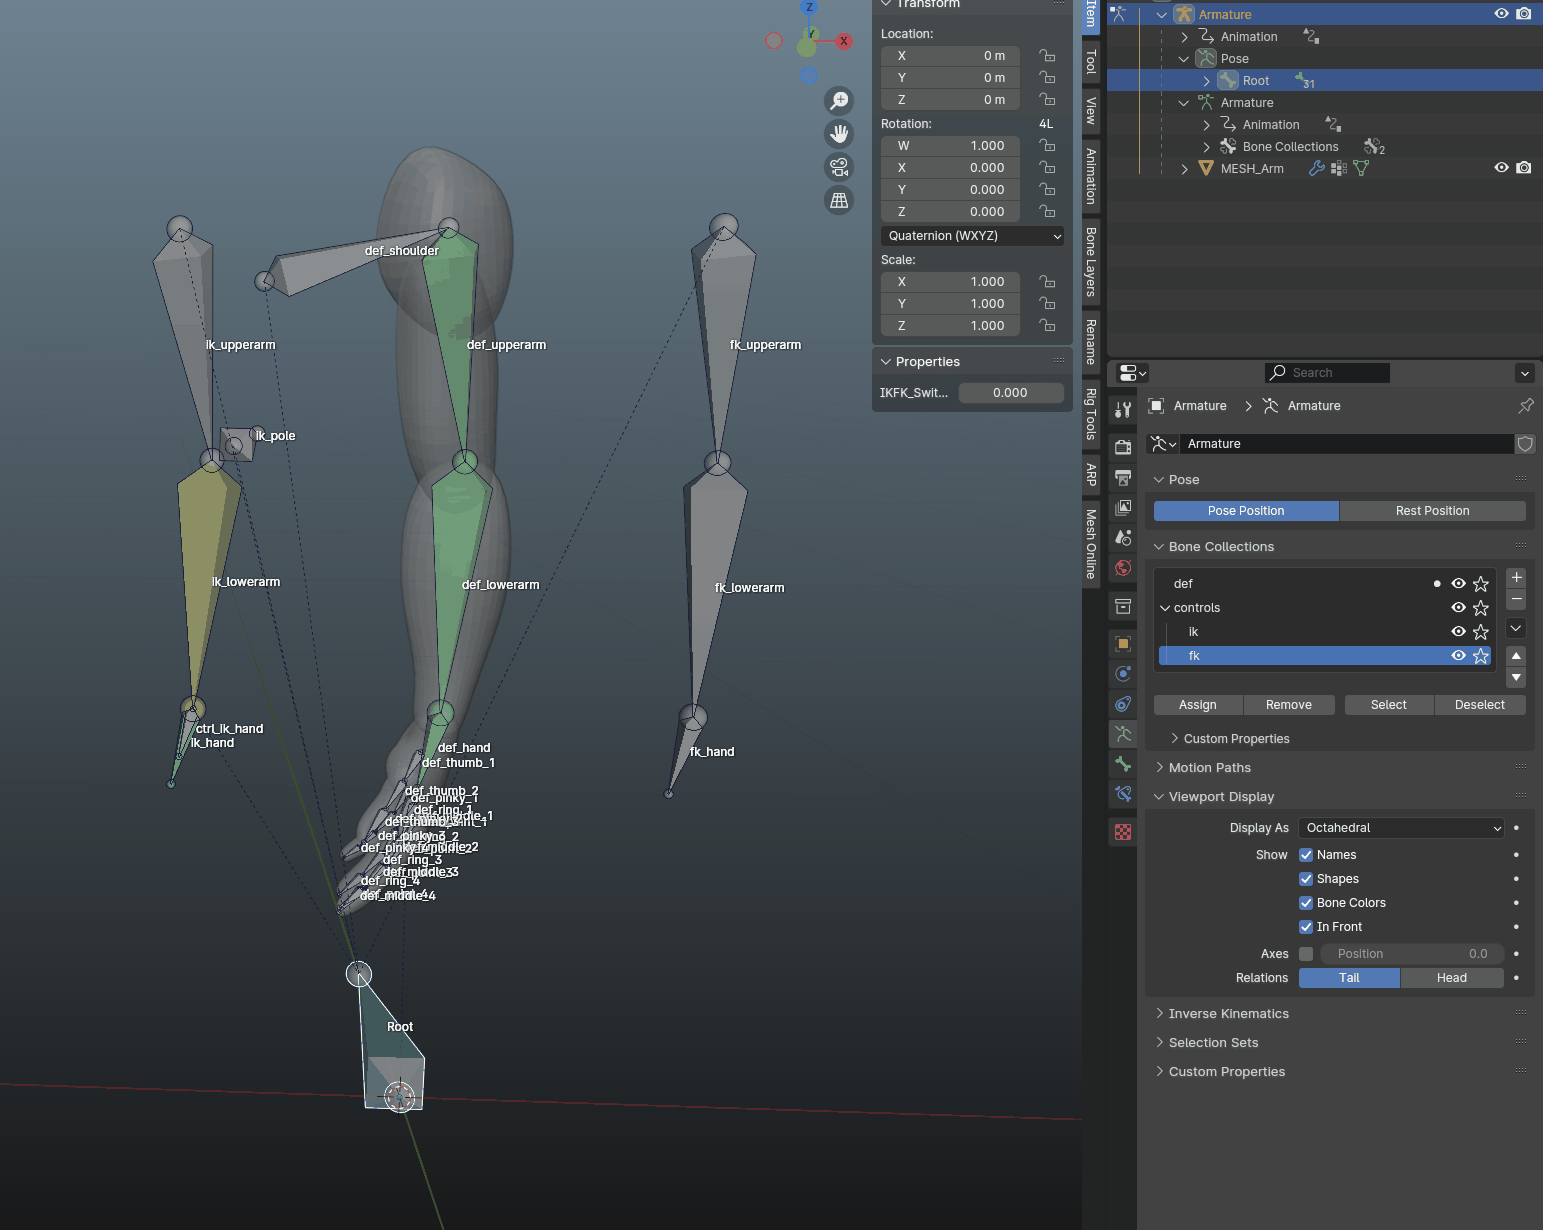
Once the setup is complete, one of the collections should dissapear accordingly. Now, test the rig: if the IKFK_Switch is set to 0, the IK controllers should be visible and active, while the FK controllers should be hidden. Setting the switch to 1 should
make the FK controllers visible and the IK controllers hidden.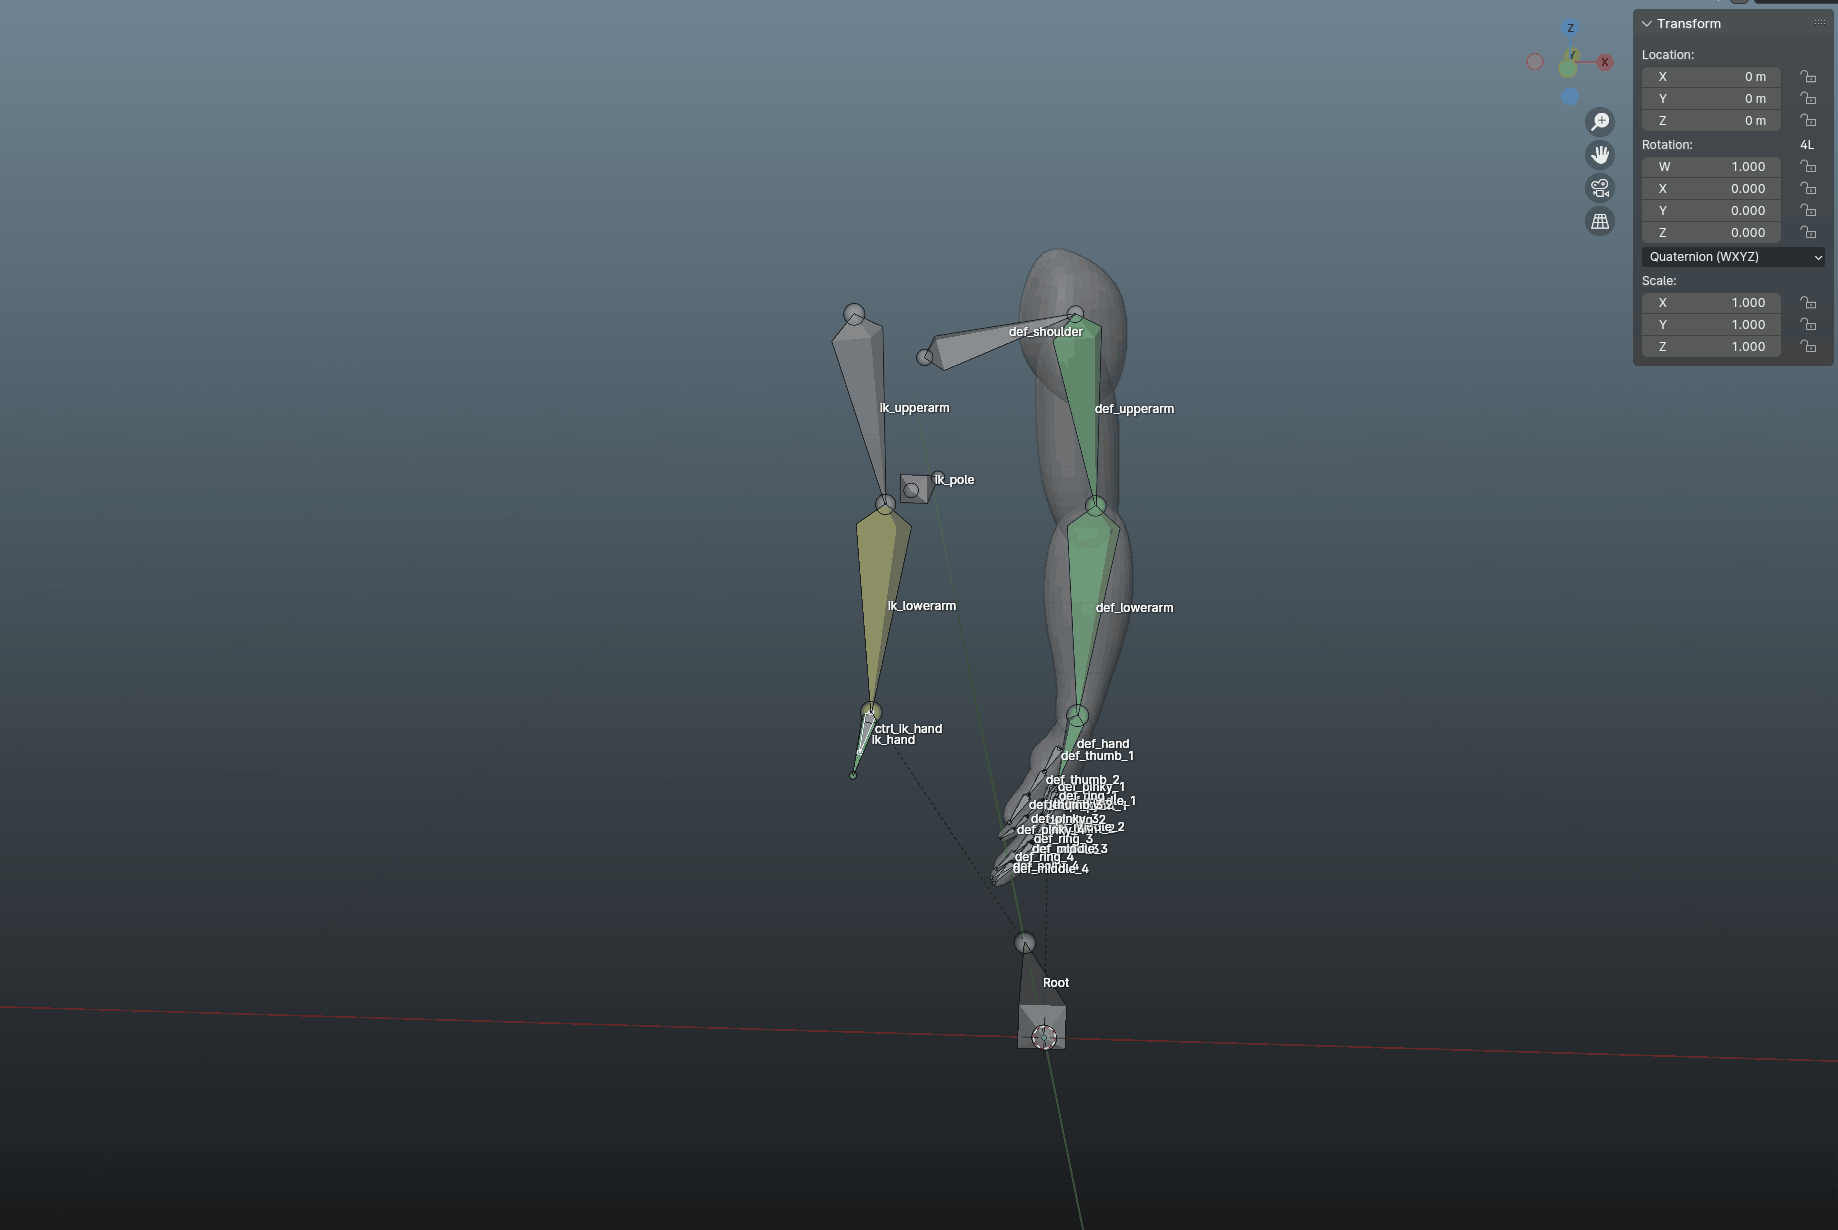
This small addition can save animators a lot of unnecessary clicking, improving their flow and focus on the tasks. Given that this setup is not time-consuming, there’s no reason not to add it whenever you’re working on any IFK switchable chain.
3. Closing Thoughts#
Congratulations on creating your own IKFK switch in blender! This setup allows to seamlessly switch (and keyframe) between FK and IK, one of the most crucial rig features. Remember to experiment with different setups and refine your rigging techniques to suit animator’s needs - because rigs do not live in a vacuum!
If you have any questions or run into issues, feel free to contact me. Thanks for following the tutorial and happy rigging!